
The Complete Guide to Raising Ducklings: From Brooder to Backyard
How to Raise Ducklings: A Practical Guide for First-Time Duck Owners
Getting Your First Ducks: What to Know Before You Bring Your Ducklings Home
Getting your first ducklings can be super exciting, or super stressful! If your place is anything like ours, you may—on rare occasions, very rare, not all that often but just sometimes—find yourself with some fuzzy, buzzy, or feathered friends before you're completely ready for them.
Maybe a quick trip to Tractor Supply turned into a scramble to figure out how to care for the 10 ducklings that mysteriously ended up in your passenger seat. Or maybe it was just a tiny bit more deliberate, and you bought them from a reputable online hatchery and now they’re showing up in a week (cough cough). Either way, this guide is for you.
Where Should Ducklings Live? Setting Up a Safe and Comfortable Brooder
The first step is to get your tiny new ducklings somewhere safe. Since we’re assuming you might already have them in your home as you read this (hi, welcome), the goal is immediate comfort and safety.
🐣 Temporary Setup First, Then Expand
Initially, your ducklings will be very small, so almost any box, tub, or container can work in the very short term. Pop your ducklings somewhere secure while you figure out the rest. If you're keeping them inside—which we recommend for now—make sure they’re protected from predators, nosy pets, and curious kids. It’s hard to predator-proof a temporary box, so indoors is the way to go.
Once you’ve bought yourself an hour or two of breathing room, it’s time to get serious about your brooder setup. Do NOT leave them in your car to go back to the store to get supplies!
📏 How Big Should a Duck Brooder Be?
Ducklings less than a week old need about 1 square foot of space per duckling. So, for the 10 ducklings that may or may not be on their way to Fuzz & Buzz HQ, we’re talking 10 square feet of space.
We do technically have a duck coop outside. But there maaayyy be a bunch of stuff in it, and it’s probably too hot for ducklings that can’t yet regulate their body temperature (they won’t be able to do that until they’re fully feathered, around 6–7 weeks old).
A 40-gallon Rubbermaid tote is about 3 feet long and 2 feet wide—roughly 6 square feet. That works short term for 4–6 ducklings, but for our highly hypothetical 10, we’d probably need two totes or another solution (we’re actually going with a larger tub and will split the group in two as they get bigger).
🧰 Other Easy Brooder Options
Large cardboard boxes lined with a tarp
A baby playpen with a tarp underneath
Wooden frames with hardware cloth sides
Puppy pens with a waterproof base
Whatever you use, aim for something you can clean, afford, and secure—and ideally something that won’t make your house smell like ducklings for the next six months. And make sure it’s at least 2.5 to 3 feet tall, or you may wake up to find a new friend snuggled in bed with you.
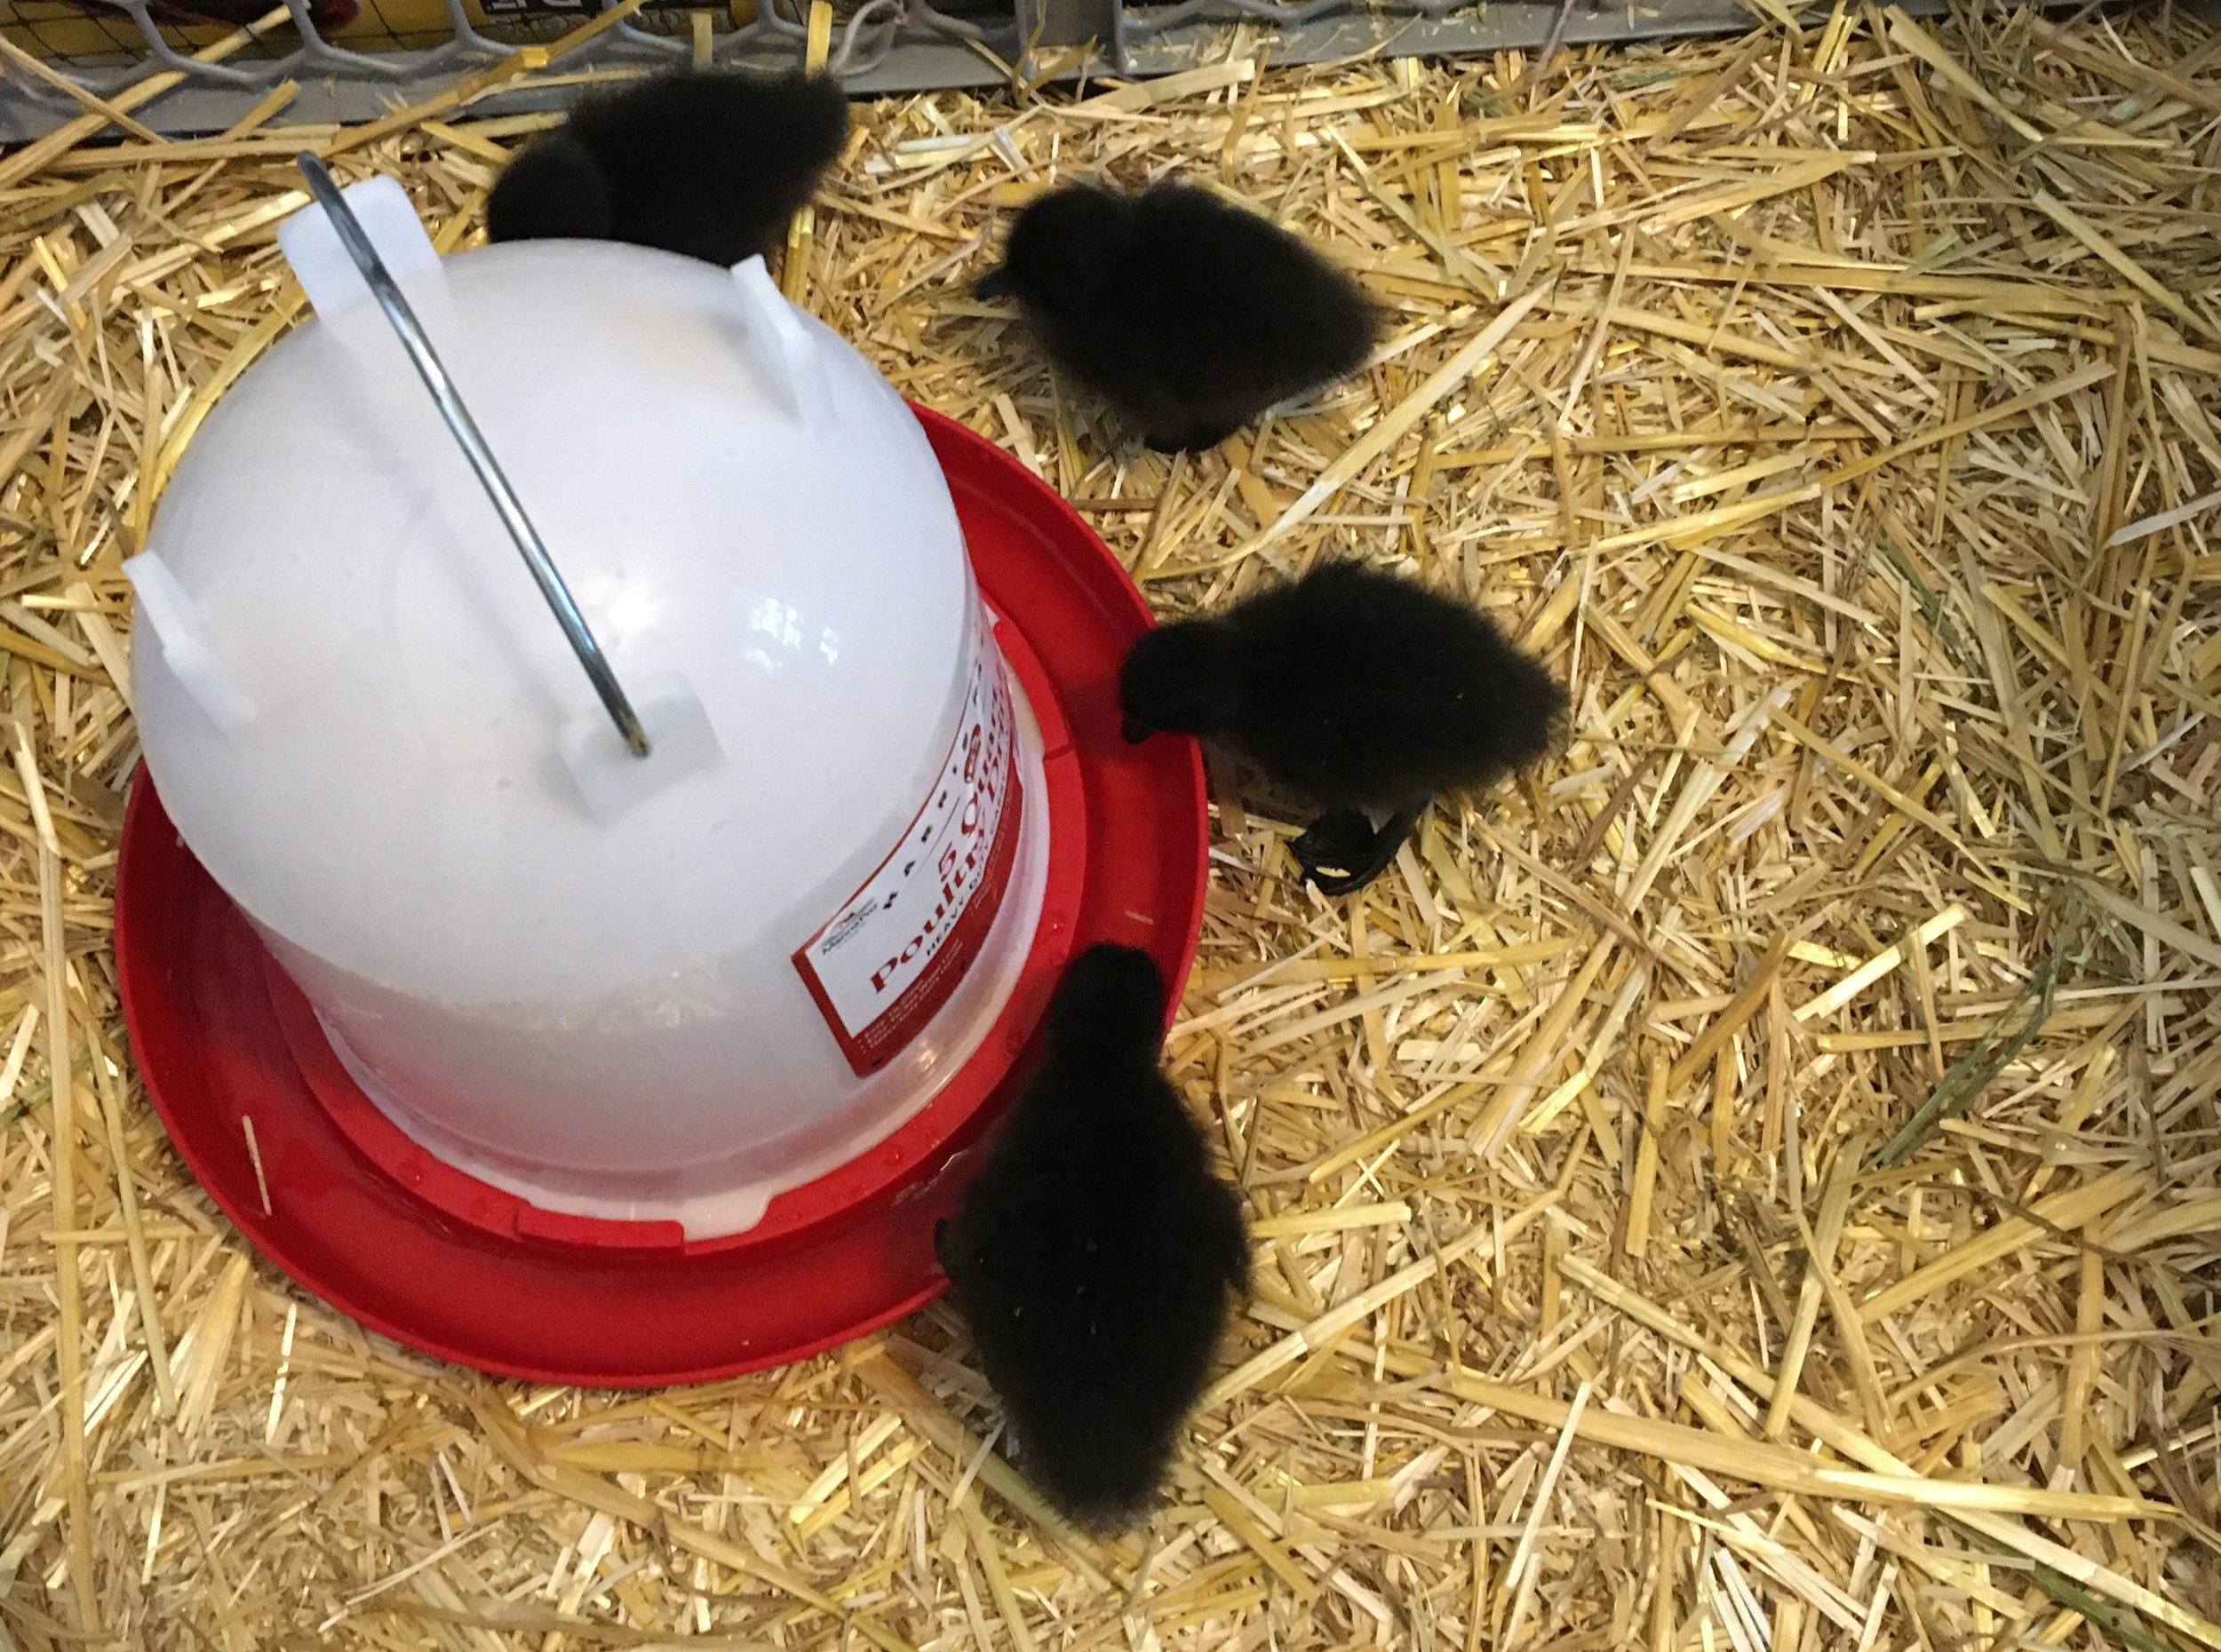
Best Bedding for Ducklings: Safe, Absorbent Options for Clean Living
Now that you’ve got your brooder space figured out, let’s talk bedding—because ducklings are, quite frankly, messy little hoodlums. You’ll want something that helps contain both smells and moisture.
We’ve tried a lot of bedding options over the years, but there are really only two we consistently recommend. Which one depends on the season and your setup.
🪵 Pine Shavings (Our Go-To for Indoor or Warm-Weather Brooders)
If your ducklings have magically teleported into your car in the summer—or you’re raising them inside during winter—pine shavings are the way to go (we use a very small flake, larger flakes don’t absorb as well). Just make sure they’re pine and not cedar, which can be harmful to birds’ respiratory systems.
Spread a good 2–3 inches of shavings on the bottom of the brooder. You don’t want the floor showing once your ducklings get in and start doing duckling things (i.e., waddling, splashing, pooping… usually all at once).

Why we like pine shavings:
Easy to keep clean
Absorbs both moisture and odor
Readily available and affordable
Can be topped off daily instead of completely changed
We add a fresh layer on top of any damp spots during the week, then do a full clean and sanitization weekly. This helps control smells and reduces mold without going overboard on effort. Just keep the total bedding height in check—stacking it too high may turn your brooder into an escape room challenge for your ducklings.
🌾 Straw (Best for Outdoor or Cold-Weather Setups)
If your ducklings arrive in fall or winter and you can’t keep them inside, keeping them warm becomes a top priority. Straw can help with that.
Straw is a natural insulator and can help keep your brooder surprisingly warm—but only if you use enough of it. A light dusting won’t do. You need a nice, fluffy layer.
Why we sometimes use straw:
Helps retain warmth
Works well in larger or outdoor setups
Can be used with the deep litter method (in coops)
But here’s the downside: it’s a pain to clean. That’s why, in our main duck coop, we use the deep litter method only during the late fall to early spring—we keep adding more straw on top and only do big clean-outs a few times a year. As the straw starts to break down, it generates a bit of heat that keeps the coop cozy.
⚠️ Important: In a small brooder, deep litter is a bad idea. You’ll run out of space fast, and straw’s low absorbency can create mold and respiratory issues. To avoid this, we always put a layer of pine shavings underneath the straw, both in the brooder and the coop.
Do Ducklings Need a Heat Lamp? How to Keep Them Warm Safely
Yes… probably. But not always. And definitely not forever.
Most ducklings will need a heat source for at least the first few weeks. The key is picking the safest and most effective option for your setup. We’ve tried a couple of different methods over the years and have some strong opinions.
🔥 Heat Lamps (AKA The Fire Hazard on a Clamp)
We started out with a heat lamp, like many folks do—those red bulbs you see at feed stores. They’re cheap, widely available, and they’ll heat a large brooder if positioned correctly.
But we didn’t love them. Here’s why:
Cons:
Huge fire hazard
Can melt plastic or ignite cardboard
Dangerous around pets and kids
Constant light can disrupt duckling sleep
Risk of overheating (no escape zone = heat stress)
A small bump can knock the lamp loose, and if it lands on your brooder wall, suddenly things are melting (or worse). We’ve heard too many stories of clamps failing or bulbs shattering. And if you have a metal setup, you could end up cooking your ducklings if your brooder walls heat up.
And don’t even get Holly started on the light. Who wants to live in a house where the lights never go off? If you turn the lamp off to give them darkness, they’ll freeze. It’s a no-win.
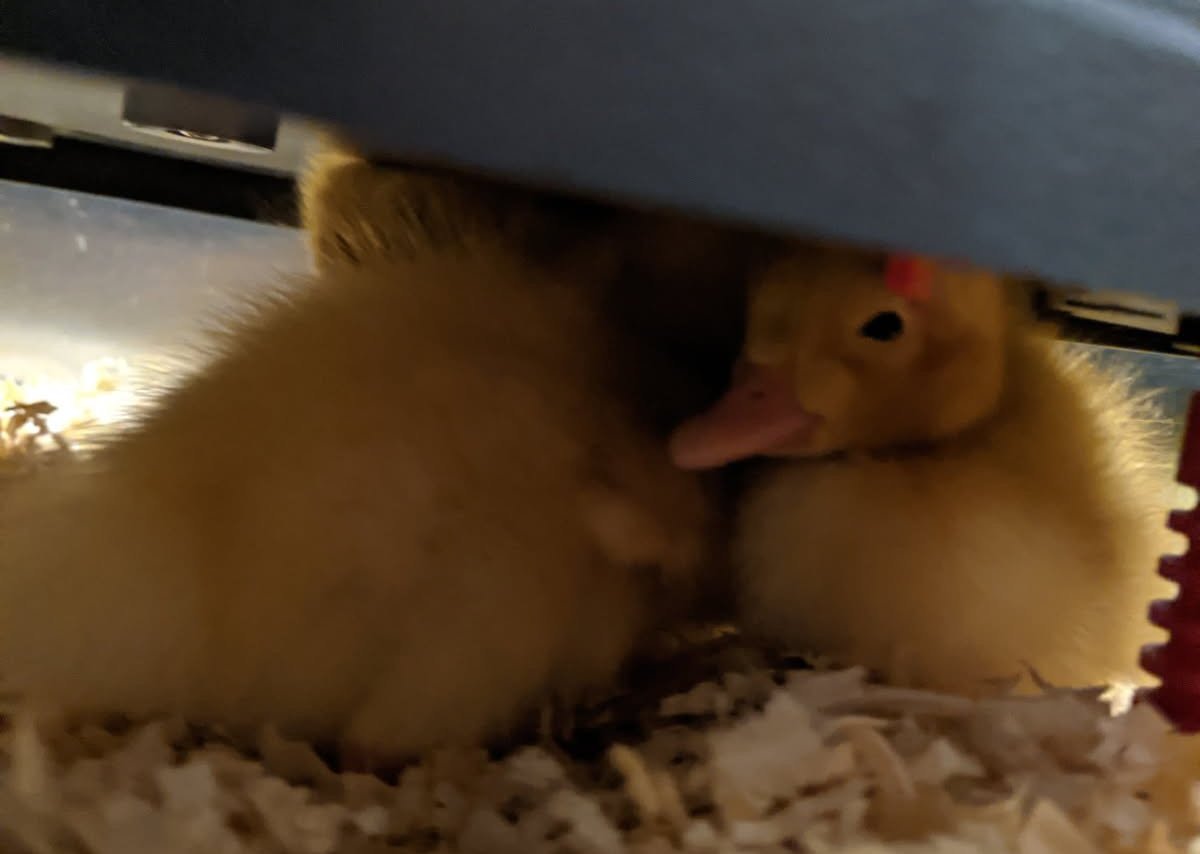
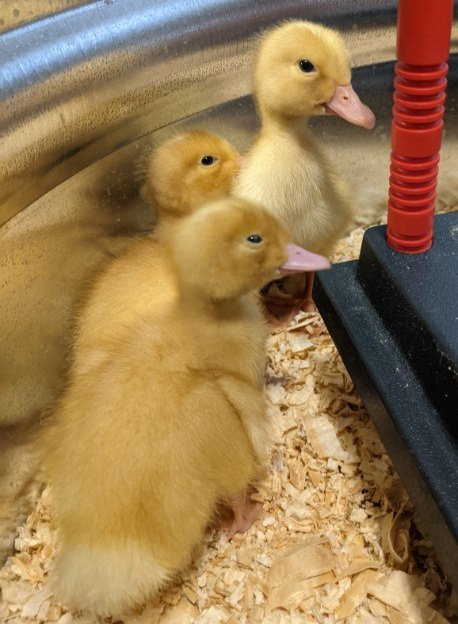
🔲 Brooder Plates (Our Preferred Heat Source)
We’ve since switched to brooder plates, and they’ve worked much better for us.
These mimic a mother duck—ducklings can snuggle underneath and self-regulate their warmth. No bright light, less fire risk, and happy, sleepy ducklings.
Pros:
Safer and more energy-efficient
No light = natural sleep cycles
Ducklings can move toward or away from heat
Takes up less space than a lamp
Cons:
More expensive upfront
Not always available in stores
Need regular cleaning (ducklings poop on top of them—of course they do)
Not always large enough for a growing group (you may need more than one by week 3)
Make sure to choose a height-adjustable plate, since ducklings grow quickly. And keep an eye on capacity—ducklings are bigger than chicks, so we always size up.
🕯️ How Warm Should Ducklings Be? Temperature Guide by Age
Now that you’ve (hopefully) picked the right heating source for your ducklings, let’s talk numbers. Here’s a quick, week-by-week temperature guide for ducklings to help you keep them cozy—but not cooked.
Week 1: Your new babies like it toasty—keep the brooder at 90–95°F.
Week 2: Drop it slightly to around 85°F.
Week 3: They can handle 80°F comfortably.
Week 4: Things are finally starting to feel human—75°F is about right.
Week 5 and beyond: Most ducklings can now handle 70°F or lower, especially if they're feathering out well.
🐤 Pro tip: Always make sure your ducklings can move away from the heat source if they get too warm. If they’re panting or avoiding the heat zone, it’s time to lower the temperature—or raise that brooder plate.
This gradual drop helps your ducklings transition safely to life outside and builds their natural ability to regulate their own body temperature.
🛡️ How to Protect Ducklings From Predators – Even During the Day
Your brooder’s set up, the bedding’s in place, and the heat source is running—everything’s coming together. You’re almost there. But before you move on to the next item on your duckling to-do list, there’s one last, absolutely critical step you don’t want to overlook:
Keeping your ducklings safe from predators.
Whether they’re indoors or outside, ducklings are incredibly vulnerable. Let’s start with a reality check: Do you have curious toddlers? A lovable, bouncy Labrador? A sneaky cat? If your brooder isn’t well-secured, these familiar faces can quickly turn into accidental predators.
And if your ducklings are outdoors, even part-time? Get ready for a wild cast of characters.
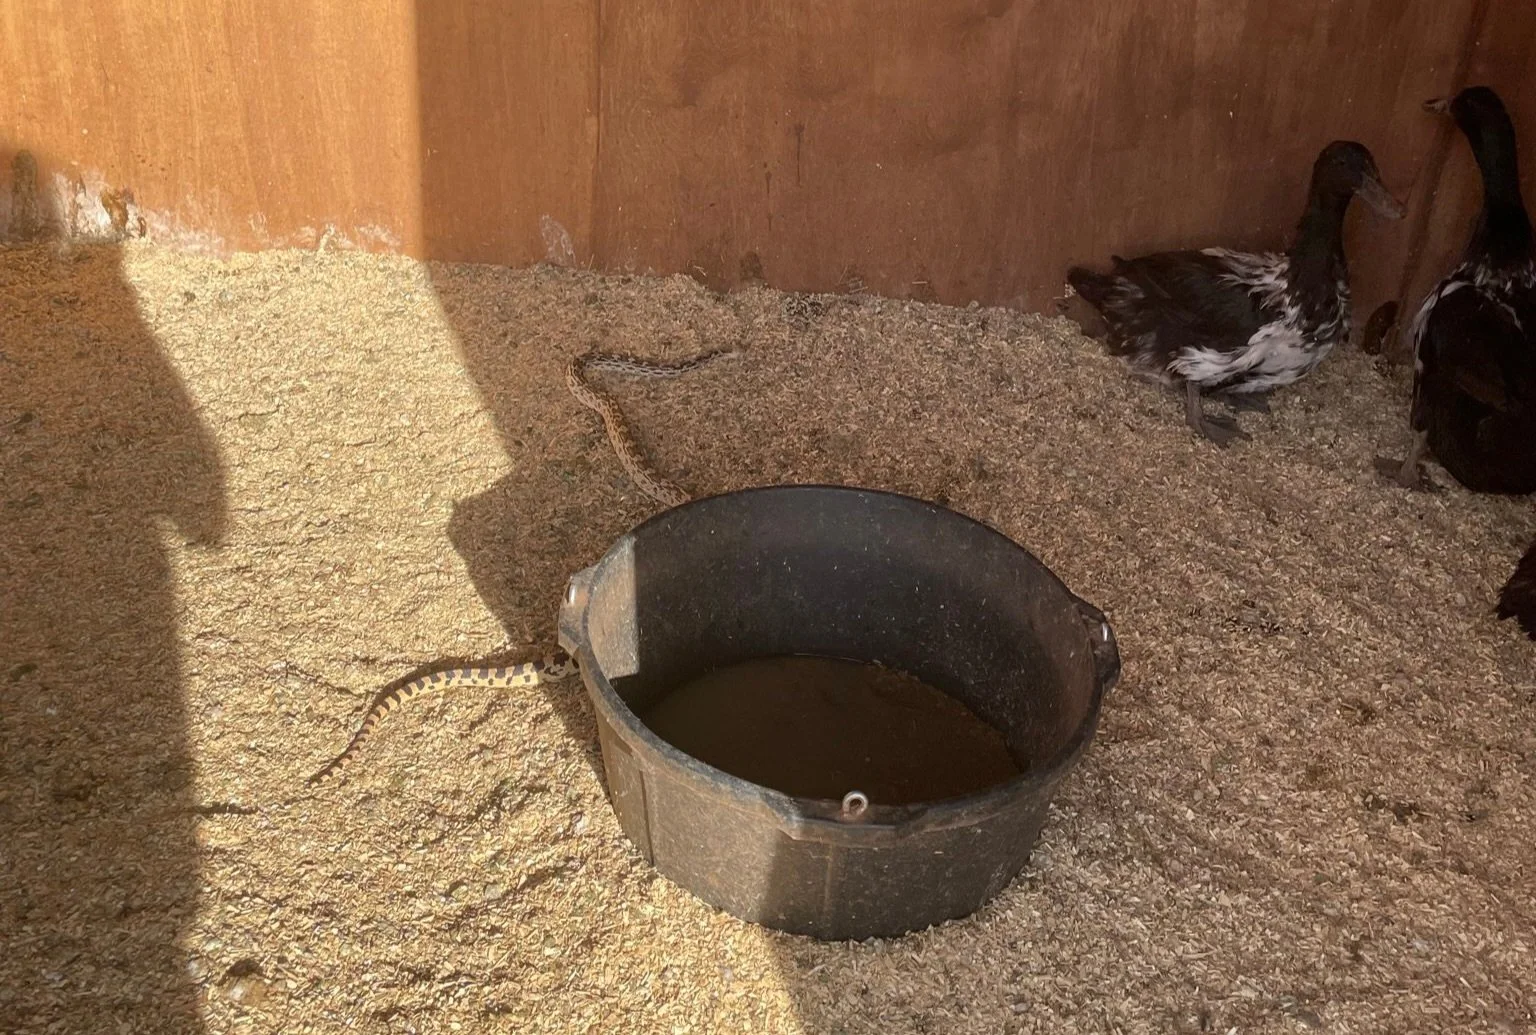
Here in the East Mountains of Tijeras, NM, we share our land with bears, foxes, raccoons, weasels, snakes, loose dogs, feral cats, great horned owls, hawks, and more. All of these creatures can pose a very real threat to your ducklings—and even to your full-grown ducks.
🐾 Common Predator Threats (And What They Can Do)
Bears
The nuclear option of predators. If you live in bear country, even a secure coop may only work until it doesn’t. Bears can rip doors off hinges and tear walls apart. If they find your ducklings once, they’ll come back. We strongly recommend keeping ducklings indoors or inside a bear-rated electric fence if you live in an area with known bear activity.Raccoons, foxes, weasels, cats, and dogs
These predators are stealthy, determined, and disturbingly smart. Raccoons, in particular, can reach through wire fencing to grab ducklings. Others might dig under fences or climb over low walls. Curious domestic pets can pose just as much risk as wildlife—especially unsupervised.Hawks and owls
If your brooder or coop isn't covered, you're asking for trouble. Birds of prey can swoop in during the day or night and make off with a duckling before you even realize what happened. Yes, even through open windows or vents.Snakes
Especially in warmer areas, snakes can slip through tiny gaps and find ducklings far too tempting to ignore.
🔒 Predator-Proofing Your Duckling Brooder
Let’s get proactive. Here’s how to protect your ducklings right from day one:
✅ Use a Secure Lid or Cover
If you’re using a solid-sided brooder (like a plastic tote or wooden box), make sure it has a sturdy, secured lid—especially at night.
Use hardware cloth (¼-inch mesh) for airflow and safety
Make sure it’s securely attached so predators or pets can’t knock it loose
Don’t block all airflow—ventilation is critical
✅ Protect the Sides and Floor
If your brooder has open sides or sits directly on the ground:
Line the inside or outside with hardware cloth
For dirt-floor setups, place a layer of hardware cloth underneath to stop digging predators
✅ Keep It Off the Ground
If possible, elevate the brooder slightly to make it harder for predators to reach in or dig under.
✅ Keep Indoor Predators Out
Even if your ducklings are inside, don’t let your guard down. Keep them off the floor and out of reach of pets and small kids unless directly supervised. Remember: a “sniff” from a dog can be a disaster when you’re the size of a baseball.
🏰 Coop Safety: Quick Tips for When They Graduate
Eventually, your ducklings will outgrow the brooder. If you're prepping a long-term coop, consider these often-overlooked predator entry points:
Digging under the coop floor → Install a buried wire skirt or solid base
Tearing through thin plywood → Reinforce walls with thicker panels or metal sheeting
Climbing into open windows or rafters → Cover vents and soffits with hardware cloth
Reaching through fencing → Lock up ducks at night and use small-mesh fencing
Opening door latches → Consider a combo lock
If you can’t fully enclose your coop or run (like us—we free-range our ducks), consider electric fencing and even livestock guardian dogs to deter larger threats.

🚨 Final Reminder
Predators don’t just come at night. Ducklings are vulnerable 24/7, and a little prevention now can save you a lot of heartbreak later. Think like a raccoon. Plan like a bear is watching. And never underestimate what a determined predator (or a house cat) can do.
With smart planning, your ducklings will stay safe and sound—just like they should.
💧 Water Safety for Ducklings: Preventing Drowning in the Brooder
Now that your ducklings have shelter and warmth, it’s time to tackle one of the most overlooked—but absolutely critical—areas of duckling care: water safety.
We all know ducks love water. It’s kind of their thing! But here’s the kicker: baby ducklings aren’t born waterproof, and that fact surprises a lot of new duck owners. Despite their natural affinity for water, ducklings can easily become waterlogged, chilled, or even drown in improperly set-up brooders.
Let’s make sure that doesn’t happen to you.
🛑 Why Ducklings Aren’t Waterproof at Birth
Ducklings are hatched with soft down feathers instead of waterproof plumage. In the wild, mother ducks coat their babies with waterproof oils by preening them. But when you’re raising ducklings without a mother duck, that protective barrier just isn’t there.
It’s not until about 4 to 6 weeks of age that ducklings begin producing enough oil from their preen gland to become water-resistant on their own. Until then, water can quickly soak into their down, making them heavy and cold—and sadly, many drown this way.
So while water is essential, how you provide it matters.
🥤 Choosing the Right Water Dish for Ducklings
When setting up your brooder, it’s easy to grab a standard poultry waterer or even a small bowl—but hold up! The best water containers for ducklings are:
Shallow – No deeper than their legs, ideally ½ to 1 inch deep
Stable – Heavy or wide-based so they don’t tip it over
Escape-Friendly – If they do step in, they should be able to climb back out
Here are a few easy modifications you can make:
Place clean river rocks or large marbles in the bottom of a shallow dish to prevent them from standing in the water or getting soaked.
Consider using a quail-style water base attached to a quart jar for very young ducklings.
As they grow, upgrade to a larger dish—but always keep safety in mind.
Ducklings are messy (as you may have already learned!), so expect to change out the water 2–3 times a day. Wet bedding can quickly become a breeding ground for mold and bacteria, which is harmful to their delicate respiratory systems.
🏊 Ducklings and Swimming: When Is It Safe to Let Them Splash?
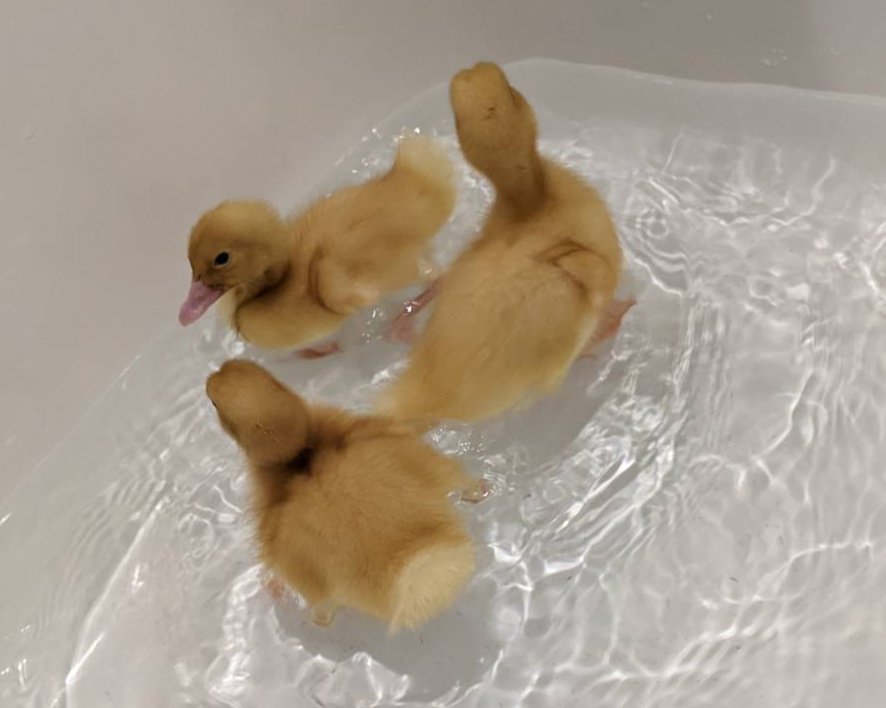
Let’s talk about the fun part—swimming!
Yes, your ducklings can swim. And yes, they’ll love it. But there are some very real risks if you introduce it too early or without proper supervision.
Here’s what to keep in mind:
Wait until at least one week of age to introduce any kind of swimming.
Use warm, shallow water—think sink, tub, or low-sided tote with just an inch or two of water.
Limit sessions to 5–15 minutes, especially in the first few weeks
Always supervise closely, and never leave them alone in water.
Dry them thoroughly afterward to avoid chills. A soft towel and a quick trip under the brooder plate can help warm them back up.
Watch for signs of being too cold: lethargy, shivering, or fluffing up.
Swimming should be an occasional enrichment activity, not an all-day affair. Ducklings will tire quickly and may not realize it until it’s too late. By around week 4, they’ll start developing feathers and waterproofing, but you should still keep a close eye on them until they’re fully feathered and preening regularly.
🥬 Duckling Nutrition: What to Feed Baby Ducks and Why Niacin Is So Important
Alright, your ducklings are warm, safe, and hydrated—now let’s talk about food!
Feeding ducklings can feel intimidating at first because their dietary needs change quickly as they grow. But don’t worry—it’s actually quite manageable once you understand the basics. In this section, we’ll walk you through what to feed ducklings week by week, explain why niacin (vitamin B3) is crucial, and help you avoid the most common nutrition pitfalls.
🐣 Weeks 0–2: High-Protein Duck Starter Feed (20–22%)

During their first two weeks of life, ducklings experience an incredible growth spurt. They’re rapidly building muscles, bones, and internal organs—which means they need a high-protein diet and plenty of nutrients to support development.
Your best bet? A waterfowl-specific starter feed, like Mazuri Waterfowl Starter Duckling & Gosling Food. It contains the right balance of protein, fat, and—most importantly—niacin. Just pop your duck food in a shallow dish and you’re good to go!
Can’t find Mazuri locally? No problem. A non-medicated chick starter can work in a pinch, but you must supplement it with niacin, as chick feed is typically formulated for chickens, which have lower B3 requirements.
How to Supplement Niacin:
Mix 1 tablespoon of brewer’s yeast per cup of feed
Or dissolve liquid niacin supplements in their water (make sure it’s the non-flush variety, often labeled as "nicotinamide")
Niacin deficiency can cause bowed legs, inability to walk, lethargy, and even death—so it’s one supplement you don’t want to skip.
🐥 Weeks 3–5: Transition to Grower Feed (18–20% Protein)
At this stage, your ducklings are still growing rapidly, but not quite as explosively as before. Now’s the time to lower protein slightly to prevent growth-related leg and joint issues.
If you’re still using Mazuri Waterfowl Starter, you can continue through this stage. Otherwise, switch to a non-medicated grower feed, and continue niacin supplementation if you’re not using a waterfowl-specific product.
Still no need for calcium at this point—too much calcium before sexual maturity can cause kidney damage.
🦆 Weeks 6–7: Maintain Growth and Introduce Treats
By now, your ducklings should be growing into gangly, awkward teenagers—with more feathers, stronger legs, and a lot more curiosity.
You can keep feeding them a grower ration or the Mazuri starter until they’re ready for adult food. This is also the stage where it’s safe to start offering treats, including:
Finely chopped greens (like kale, romaine, or dandelion)
Peas (thawed if frozen)
Mealworms (live or dried)
Important: Once treats are introduced, you need to also offer grit (coarse sand or chick grit) to help them digest non-feed items.
Their feather growth really accelerates here, so they still need good nutrition—just not as high in protein as before. Niacin supplementation becomes optional if you're feeding a quality waterfowl feed, but keep a close eye on leg strength and posture.
🪶 Weeks 8–17: Young Adult Ducks and the Switch to Maintenance Feed

At this stage, your ducklings are mostly grown in size and starting to look like real ducks. Now’s the time to switch to an adult maintenance feed such as Mazuri Waterfowl Maintenance Pellets.
This feed has:
Moderate protein levels to prevent obesity
Low calcium to protect non-laying ducks and drakes
Balanced nutrition for healthy feather and muscle development
Keep giving treats in moderation, and don’t forget the grit. You can also start training your ducks with nightly snack rituals (we’ve found it makes bedtime a lot easier, especially with stubborn ducks!).
🧠 Do not switch to layer feed yet—even if your ducks are “almost there.” Wait until they actually begin laying.
🥚 Week 18+: When to Add Layer Feed—or Not
Some ducks may begin laying eggs as early as 18 weeks old. At this point, you’ll need to adjust their diet to support strong eggshell development and reproductive health. But that doesn’t mean switching your entire flock to layer feed.
We recommend a more flexible approach:
Continue feeding maintenance pellets
Offer free-choice oyster shell in a separate dish for laying ducks
Laying hens will instinctively eat the oyster shell, while drakes and juveniles will ignore it. This prevents accidental overconsumption of calcium by non-layers, which can cause serious health issues like kidney failure.
🚩 Watch for Nutrition-Related Red Flags
Even with a great diet, issues can still pop up—especially if you have a picky duck or one that loves to forage. Be on the lookout for:
Weak or wobbly legs (possible niacin deficiency)
Soft-shelled or malformed eggs (calcium deficiency)
Sudden weight gain (overfeeding protein or treats)
Nutrition isn’t one-size-fits-all, but by following this structure and staying observant, you’ll set your ducks up for long, healthy lives.
How to Handle Ducklings: Bonding Without Stressing Them Out
If you’re raising ducklings for the first time, you may be wondering: How much handling is too much? or How do I bond with ducklings without scaring them? The truth is, ducklings are delicate little creatures, and building trust takes patience. In this guide, we’ll share practical, gentle techniques for handling ducklings that support bonding while keeping your baby ducks happy, safe, and stress-free.
👤Types of Duck Owners: Finding Your Handling Style
When it comes to duckling care, most people fall into one of three categories:
Hands-Off Duck Owners – Provide food, water, and shelter, but prefer minimal interaction.
Somewhat Hands-On – Want ducks that can be picked up or petted occasionally.
Very Hands-On – Love cuddling, carrying, and interacting with their ducks often.
There’s no one-size-fits-all answer to how much you should handle ducklings. This article is mainly geared toward folks in categories two and three—those who want friendly, manageable ducks without overdoing it.
⏳Step One: Let Your Ducklings Settle In
Ducklings go through a lot right after hatching or arriving at your home. Give them at least 24 to 48 hours to adjust before trying to touch or pick them up. During this time:
Make sure they have clean water, quality starter feed, and safe heat.
Sit near their brooder and speak to them gently so they get used to your voice.
Avoid sudden movements or loud noises that can cause stress.
This early approach lays the foundation for positive human-duckling interaction down the line.

🤝Step Two: Build Trust Through Calm, Consistent Interaction
Before you attempt to hold your ducklings, start by simply being present.
Spend time quietly sitting near the brooder each day.
Offer age-appropriate duck treats or crumble from your hand.
Let them come to you at their own pace.
Over time, they’ll learn that your presence means good things—like food and calm energy—not danger. This is essential for bonding with ducklings naturally.
🫶Step Three: Learn to Handle Ducklings Safely
When your ducklings begin to trust you, it’s time to gently introduce handling. Here’s how to do it right:
Always use two hands. One should support their belly or chest; the other rests lightly over their back to keep them secure.
Hold ducklings close to your body. This prevents flailing or falling, and helps them feel safe.
Avoid picking them up from above. Instead, scoop from the side to reduce triggering their prey instincts.
Start with short sessions. Limit handling to just 1–2 minutes at first, and increase gradually as your ducklings become more comfortable.
Pro tip: Never hold ducklings high off the ground. A short fall can cause serious injuries.
👧Involving Children in Duckling Care (The Safe Way)
Kids can absolutely participate in duckling care—but with extra precautions:
Young children should only handle ducklings while seated to avoid drops.
Supervise all interactions and coach children to avoid squeezing, hugging, or chasing.
If the duckling starts peeping loudly, squirming, or flapping, it’s time for a break.
Always wash hands thoroughly after contact—and consider changing clothes after lap cuddles.
This ensures a safe experience for both kids and ducklings, while teaching gentle, respectful animal care.
⚠️Signs of Overhandling: Know When to Step Back
Ducklings can become overwhelmed by too much handling or attention. Watch for these signs of stress in ducklings:
Constant peeping or running away when you approach
Panting, trembling, or freezing in place
Avoiding food, water, or the heat plate after interaction
If you notice these behaviors, take a break from handling for a few days and let them reset. Stress can impact both their health and their relationship with you.
🌿Why We Choose a Middle-Ground Approach at Fuzz & Buzz Farms
Here at Fuzz & Buzz Farms, we fall somewhere between hands-off and super-snuggly. We want our ducks to be comfortable being handled—but no kisses or lap naps here. Why? A few reasons:
Health & safety: Ducks, like chickens, can carry salmonella and other zoonotic diseases—yes, even the backyard kind. That’s why we wash hands after every cuddle session. (The CDC has more on safe poultry handling, if you want the full breakdown.)
Realistic expectations: Ducks aren’t pets in the same way a dog or cat is. They often prefer independence and don’t always enjoy cuddling.
Ease of care: Ducks that are used to calm, gentle handling are easier to examine, treat, or move if needed.
By building trust instead of dependency, we aim for a flock that’s friendly, safe, and low-stress—for everyone involved.
🐥Final Thoughts: How to Raise Healthy, Happy Ducklings
Bonding with ducklings is a rewarding part of raising backyard ducks, but it must be done thoughtfully. By giving them time to adjust, handling them properly, and respecting their boundaries, you’ll raise ducklings that are both trusting and resilient.
Whether you’re going hands-on or keeping your distance, the key to success is always the same: put the ducklings’ wellbeing first. They’ll thank you for it—with happy peeps and confident waddles.
🧺 Wrapping It All Up: Raising Ducklings Like a Pro
Let’s finish up. Raising safe and happy ducklings isn’t just a cute hobby—it’s a real commitment. These tiny, fluffy creatures depend on you for everything: warmth, food, protection, and care. Yes, there’s going to be more poop than you imagined. Yes, it’s going to get messy. And yes—it’s still 100% worth it.
At Fuzz & Buzz Farms, we’ve learned that raising ducklings successfully is about research, trial and error, and staying curious. That’s what this guide is all about—and why we’re sharing everything we’ve learned (and are still learning!) along the way.
Stick with us for upcoming articles where we’ll dig deeper into duckling care with practical, real-life tips:
🩺 Duckling First Aid – How to handle common health scares without panicking
☀️ Summer Duckling Survival Guide – Heat and fly control for happy, healthy ducks
🪶 From Fluff to Feathers – Duckling growth & outdoor transition timeline
🧬 Duckling Gender & Flock Integration – What to know and when to act
Raising ducks is part science, part chaos—and 100% rewarding.